

Use the navigation element to guide user exploration
Add a navigation element to your workbook to display a list of destinations users can visit. The navigation element shows each destination as an individual button, which you can configure to send users to a workbook page, workbook element, or external link when clicked. Submenus allow you to nest additional navigation options under a top-level option.
The navigation element is a layout element, allowing you to guide users and create focused interfaces as you build AI apps in Sigma.
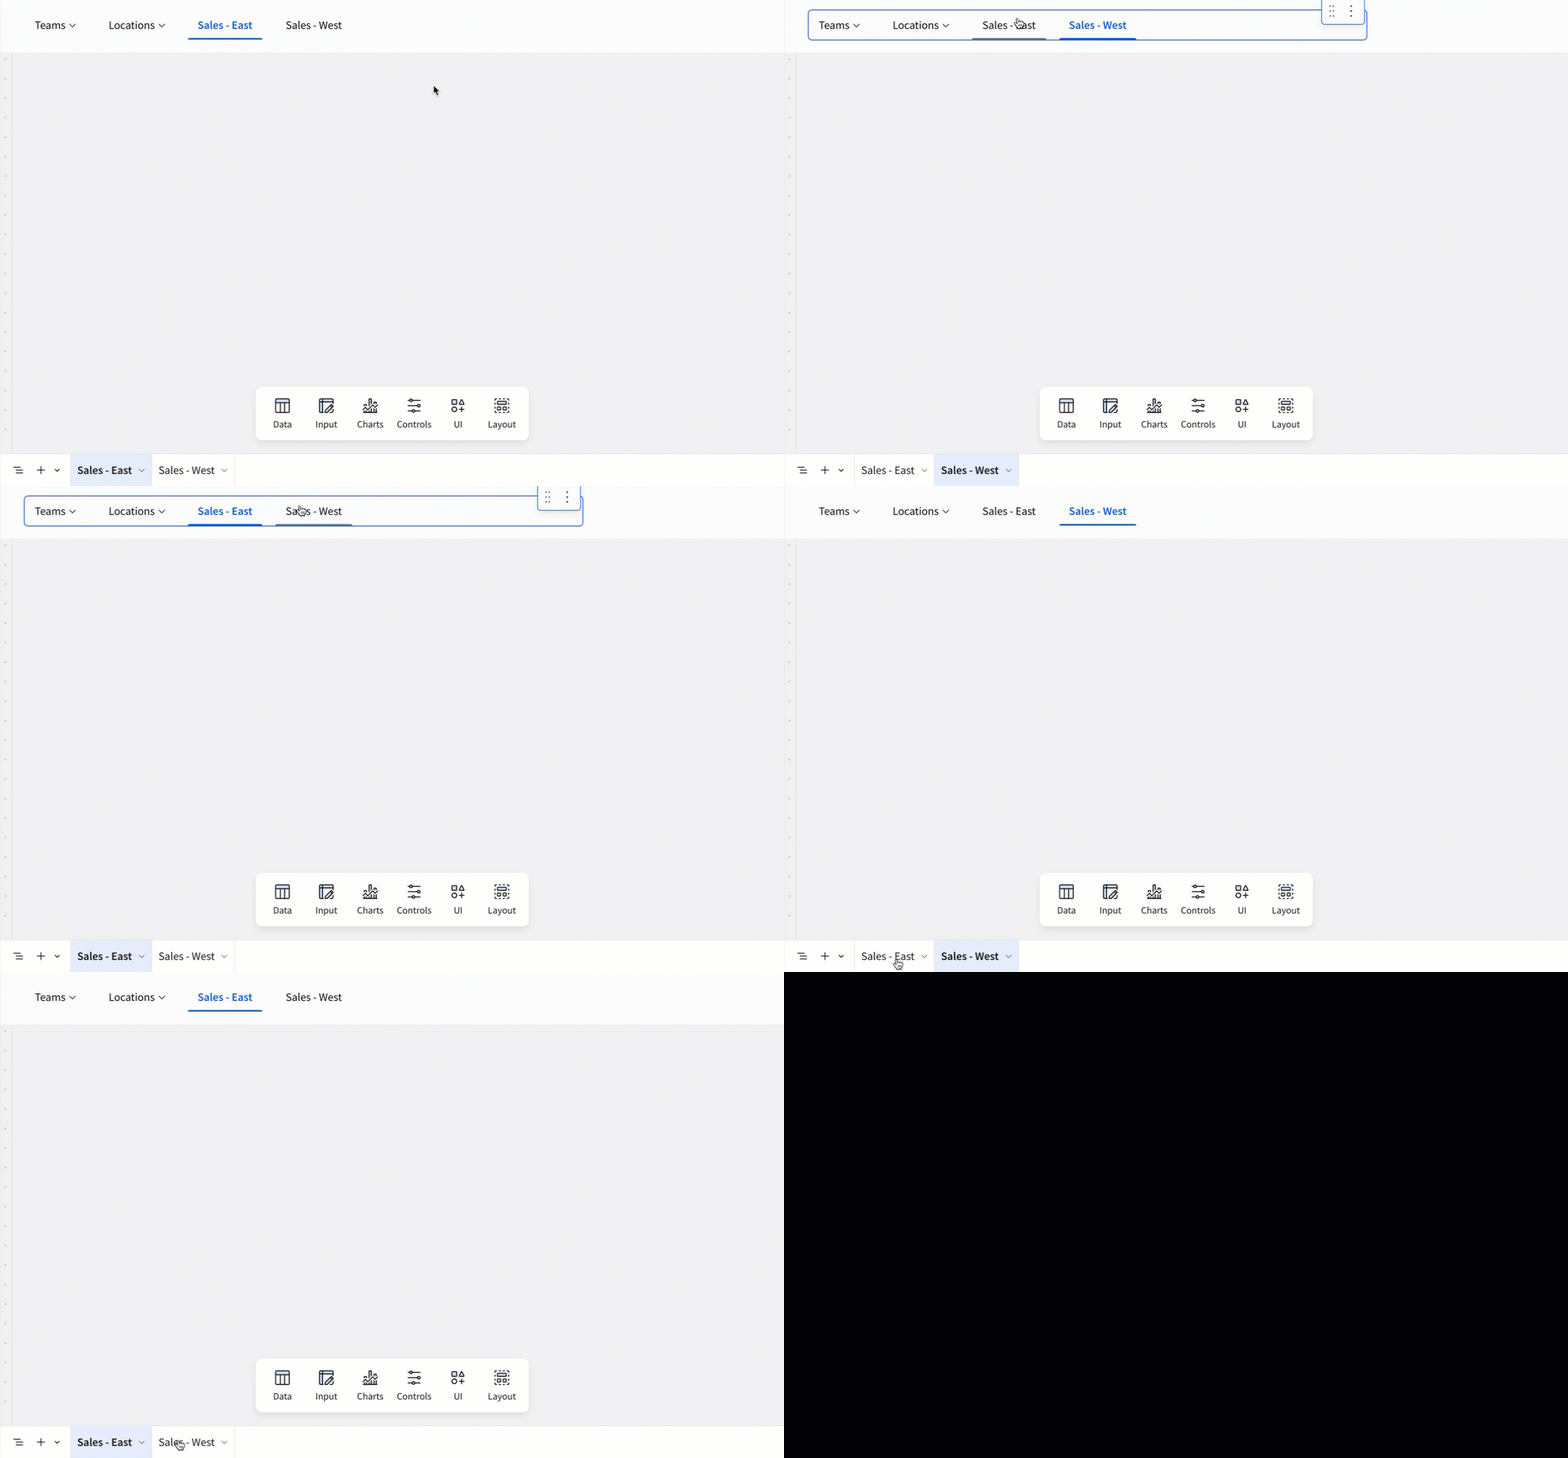
Use a navigation element when you want to:
- Provide a list of destinations for users to explore.
- Hide the native workbook page navigation.
- Link to workbook pages and external links in the same list of options.
To create a container with several tabs of content on a single workbook page, see Use tabbed containers to organize workbook content.
To create a static page header or sidebar that is shared by multiple pages, see Add custom page panels to a workbook.
User requirements
The ability to create and customize a navigation element requires the following:
- You must be assigned an account type with the Create, edit, and publish workbooks permission enabled.
- You must be the workbook owner or be granted Can edit access to the workbook.
Create a navigation element
Add a navigation element to your workbook:
-
Open a workbook draft.
-
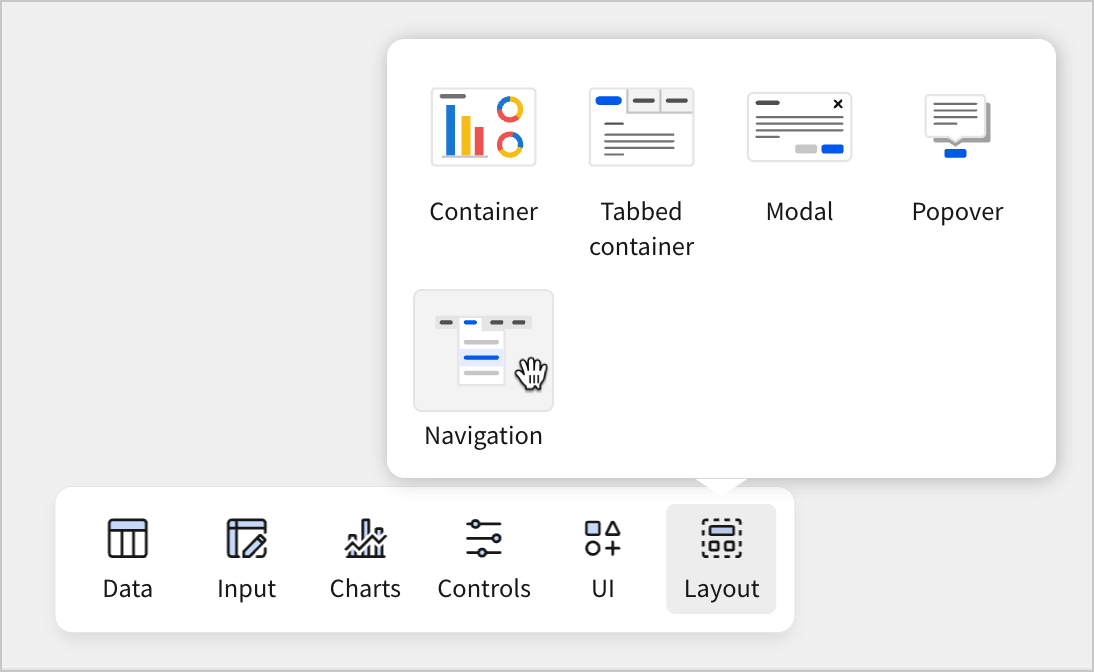
In the Add element bar, select Layout, then select Navigation.
By default, the navigation element populates in Auto mode, listing the current workbook pages as the navigation options. For example, if your workbook has pages titled Sales - East, Sales - West, and Raw Data, those three pages appear as options when you create a navigation element. For more information on customizing destination options, see Set manual navigation options.
Customize a navigation element
To customize the content or style of a navigation element, see the following sections:
- Set automatic navigation options
- Set manual navigation options
- Style a navigation element
- Create a nested submenu of navigation options
Set automatic navigation options
You can set navigation options to automatically match the current workbook pages:
- Select the navigation element.
- In the editor panel, select Properties.
- Select Auto.
In Auto mode, the navigation element lists all current workbook pages as navigation options. Changes to the workbook pages (new pages, renamed pages, deleted pages) automatically appear in the navigation element. Hidden pages do not appear as navigation options.
Any customization requires you to convert the navigation element to manual mode. See Set manual navigation options.
Set manual navigation options
You can manually set a list of navigation options including custom destinations, names, and nesting.
Set a navigation element to manual:
-
Select the navigation element.
-
In the editor panel, select Properties.
-
Select Manual.
Setting a navigation element to Manual stops automatic updates based on changes to workbook pages. This allows you to set the navigation options independently of the current workbook pages.
To add a new navigation option:
-
Select the navigation element.
-
In the editor panel, select Properties.
-
Select Manual.
-
Click
 Add an option and select an option from the menu:
To edit a navigation option:
-
Select the navigation element.
-
In the editor panel, select Properties.
-
Select
 Options for the navigation option you want to edit and select an option from the menu:
Style a navigation element
You can configure the padding, background color, and corner style for a navigation element:
-
Select the navigation element.
-
In the editor panel, select Format.
-
Expand the Element style section to view the style settings.
-
Configure the style settings:
You can configure the appearance, orientation, alignment, and color of the options in a navigation element:
-
Select the navigation element.
-
In the editor panel, select Format.
-
Expand the Option style section to view the style settings.
-
Configure the style settings:
Create a nested submenu of navigation options
In a manual navigation element, you can configure a nested submenu of navigation options.
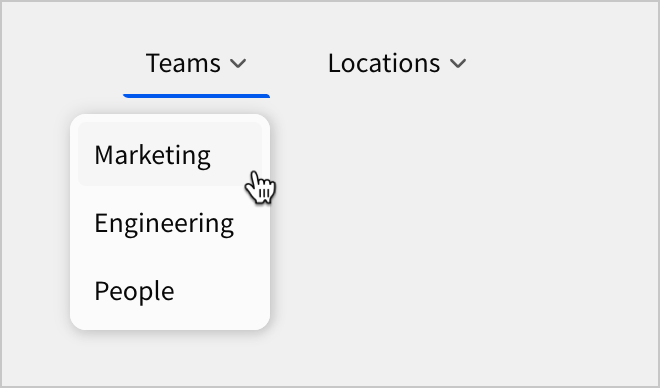
- Select the navigation element.
- In the editor panel, select Properties.
- Select Options for the navigation option you want to add to the submenu.
- Select Move to.
- Select an existing submenu or create a new one by selecting another navigation option.
- Repeat steps 3-5 for each navigation option you want to add to the submenu.
Alternatively, you can drag and drop a navigation option under another navigation option in the editor panel to create a submenu.
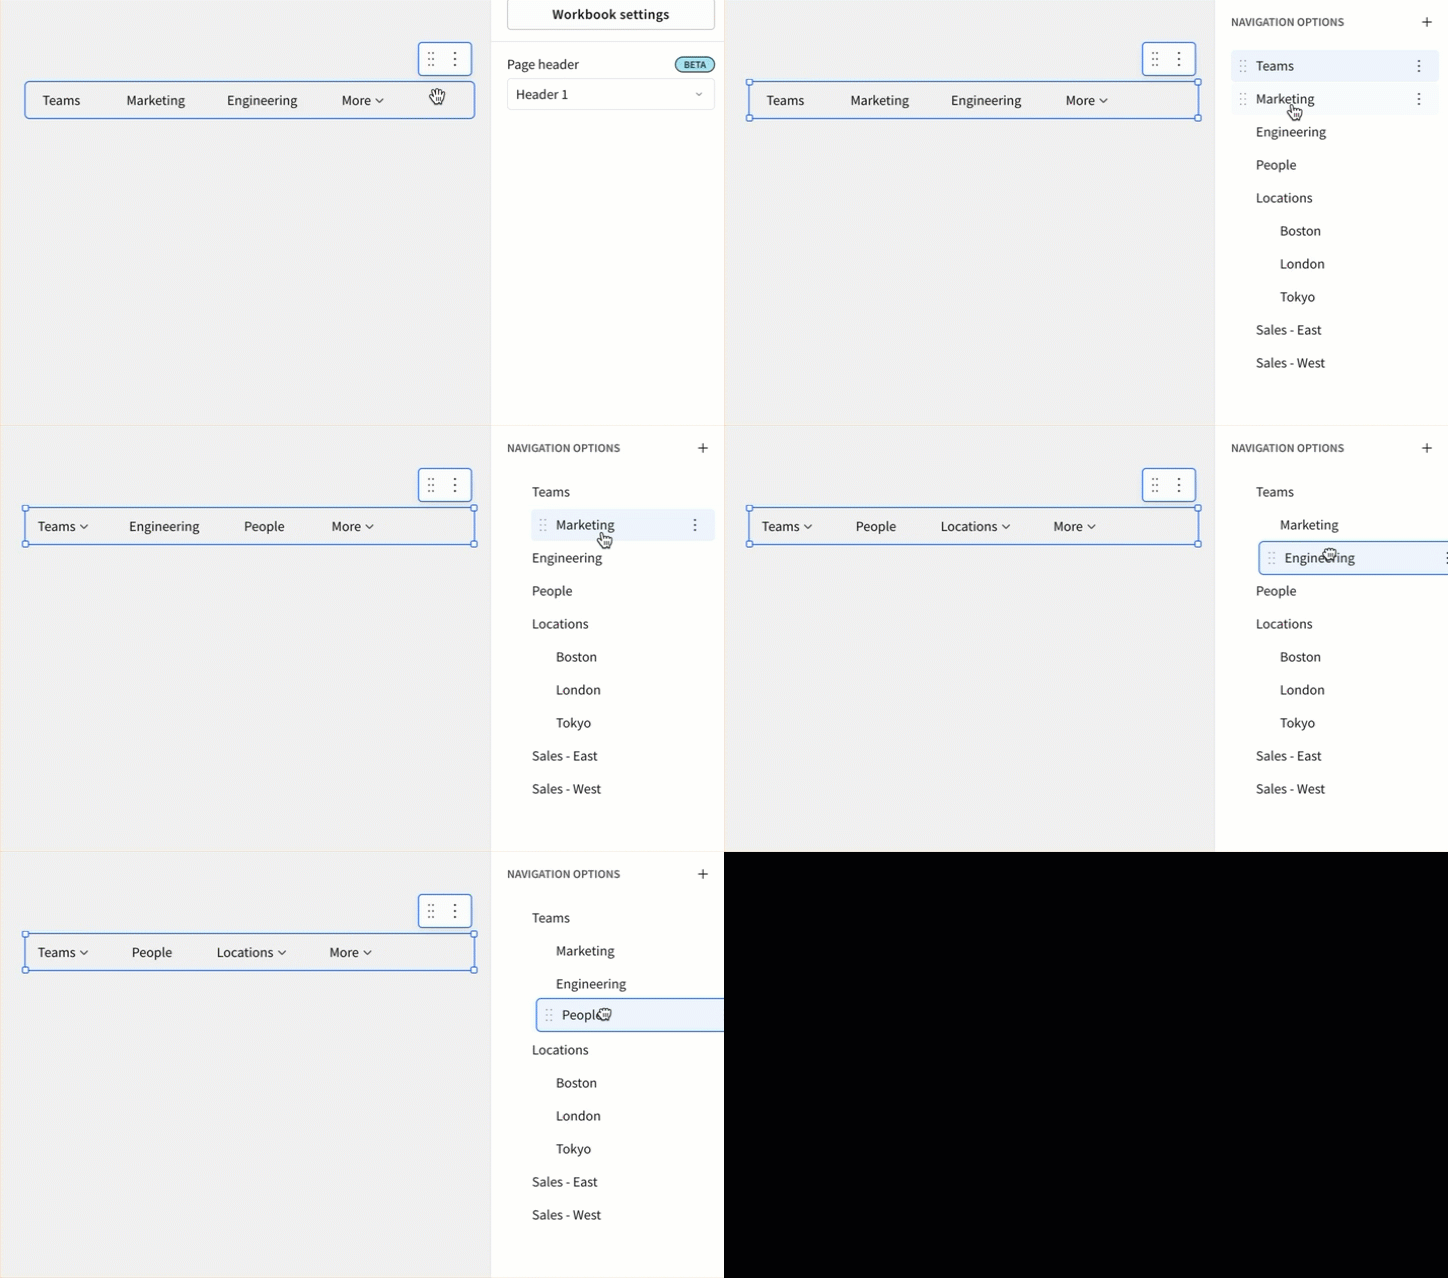
The title of a submenu is not a navigation option. Sigma recommends creating an empty navigation option to move other options into.
Delete a navigation element
You can delete a navigation element directly from the workbook page:
- Select the navigation element.
- Click More.
- Select Delete element.
Hide page tabs in view mode
You can hide the workbook page tabs from users in view mode, allowing you to set a navigation element as the primary navigation for your workbook.
To hide the workbook page tabs in view mode:
- Select the workbook page.
- In the editor panel, under Settings, select Workbook settings.
- Open the Layout settings.
- In the Layout settings section, check the box next to Hide page tabs in view mode.
- In the confirmation modal, click Confirm.
Hiding page tabs can be combined with a page header and navigation element to create a custom navigation bar. For an end-to-end example that uses a page header and navigation element to create a custom navigation bar, see Example: Use a page header and navigation element to create a custom navigation bar.
Hiding page tabs does not prevent users from navigating to the page from a direct link and is not a security feature. To restrict access to data, use a data model with row-level security or column-level security. For more information, see Set up row-level security and Configure column-level security.