
Define an action condition
You can define an optional condition for any action sequence to control the circumstances in which the actions in that sequence should take effect. The condition can be a custom formula or, if you are configuring an action sequence for selected controls, the condition can be the value of the control. Conditions based on custom formulas can reference action variables to reference the values the user selected in a table or visualization. For more information about actions in Sigma, see Intro to actions.
To make an action sequence conditional, click  More, then click Add condition when creating or editing the action.
You can configure multiple action sequences, each with an optional condition. If a user interacts with an element that has multiple action sequences configured, each action sequence triggers if its condition, if there is one, evaluates to true.
Example: Modify a chart display based on a segmented control
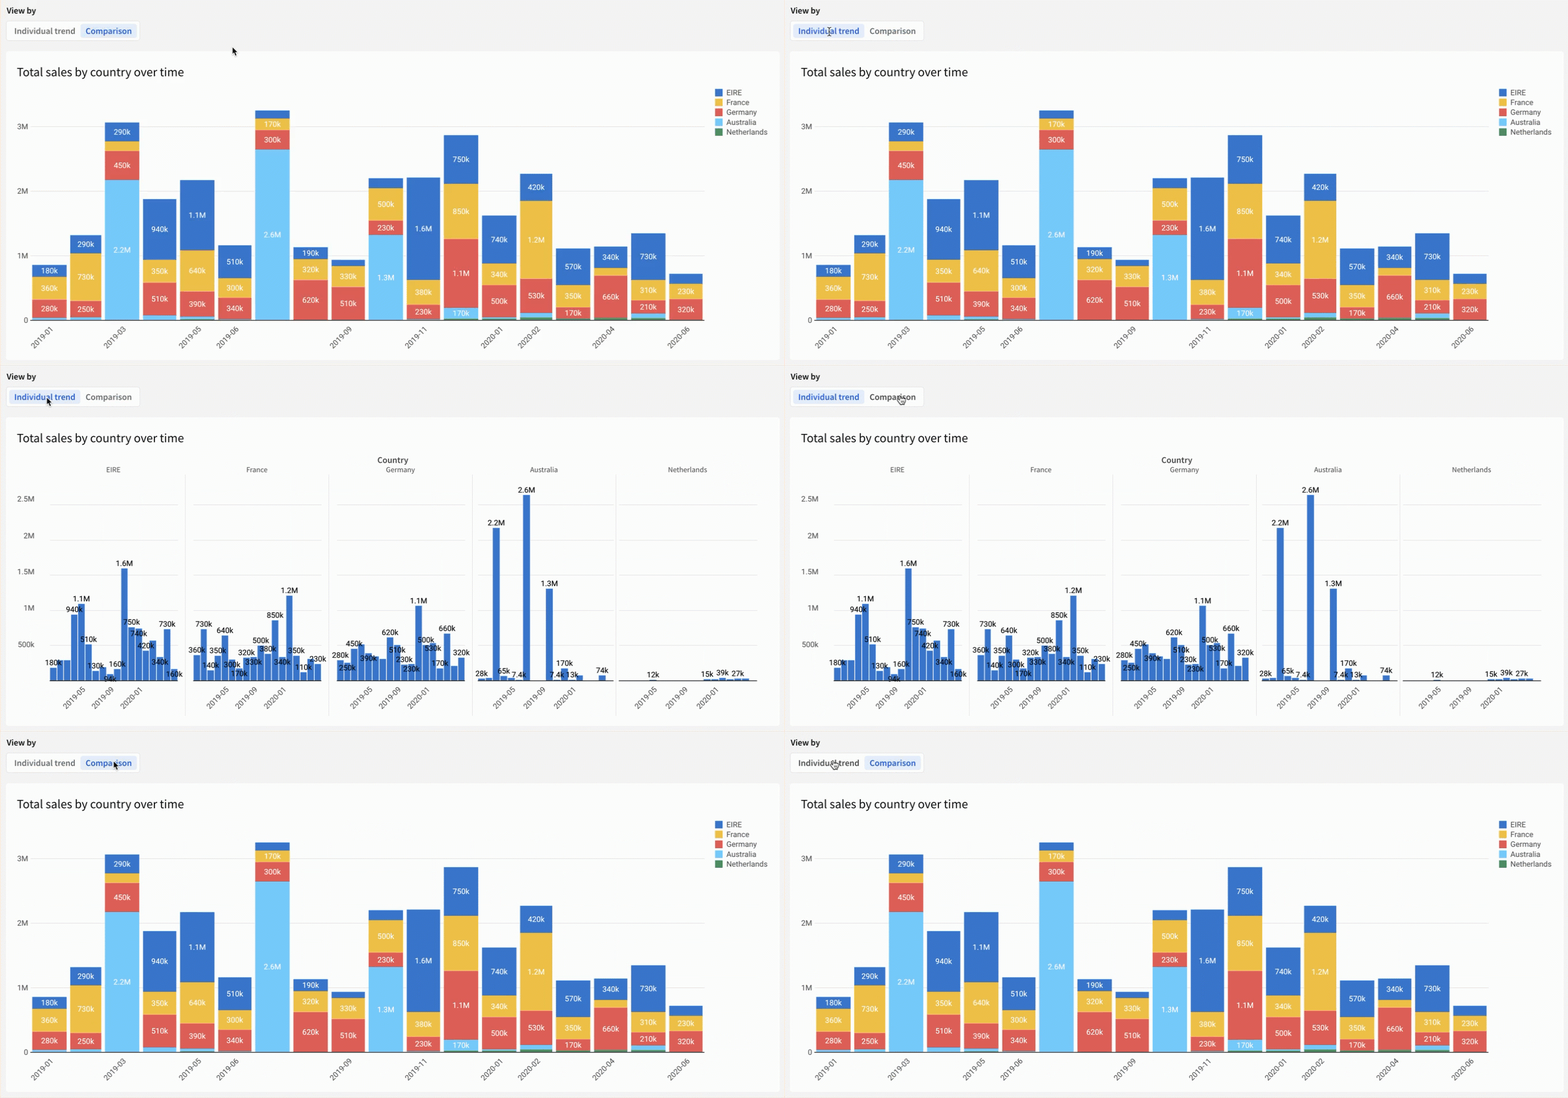
You can configure an action on a segmented control that modifies the display of a visualization based on the value the user selects in the control. For more about using segmented controls, see Create and configure a segmented control.
For example, if you have a chart showing the total sales, broken down by region, you can add a segmented control to allow users to change the display of the chart to their preferred view.
To achieve this, follow these steps:
-
Add a segmented control targeting your visualization, giving it two values:
Individual trendandComparison. -
Add an action sequence on the control with the following configuration:
-
Add a second action sequence on the control with the following configuration:
-
You now have two action sequences configured on your segmented control, each one modifying your visualization element based on the value of the segmented control.
-
Publish your changes to the workbook.
When viewers interact with the control, they can now swap back and forth between the individual trend and comparison view of the data in your visualization.
Example: Limit form submissions with a deadline
You can configure a condition on an action sequence to prevent it from occurring if a deadline has passed.
For example, if you are creating a form, you can configure the action on the submission button to insert a row in an input table only if the deadline has not yet passed. For more information about actions that insert rows in input tables, see Create actions that modify input table data.
To achieve this, follow these steps:
-
Create a workbook with an empty input table, one or more text controls, and a button element.
-
Configure the input table data entry permissions to allow edits in the published version. See Configure data governance options in input tables for details on how to modify data entry permissions.
-
Add another control of any type to the workbook, then open the editor panel and set the Control type to
Date. In this example, the date control has a control ID ofDeadline-Control. -
Set a date in your date control to a future date. This date is used as the deadline when you set the condition.
-
Select the button element.
-
In the editor panel, open the Actions tab.
-
Add an action sequence with the following configuration:
-
Publish your workbook, then view the published version.
-
Test your action by entering text in the text controls, then clicking the button.
- If the date in your date control is set to a date later than today’s date, the values of your text controls should appear as new rows in your input table.
- If you update the date in your date control to today’s date or any past date, clicking the button does not insert a row, because the deadline has passed.